Mon - Fri 8:00AM - 5:00PM Central
1150 SE Hamblen Rd, Lee's Summit, MO 64081
Choosing polymer modified concrete is not a brand comparison. It is a fit decision between the repair material, the existing substrate, and the exposure. ACI 548.3R, the American Concrete Institute’s guide to polymer-modified concrete, discusses material selection and application considerations. These matter on site: a patch beside a salt-exposed bridge joint faces different demands from a thin overlay inside a dry building.
The need for durable repairs is substantial. The American Society of Civil Engineers’ 2021 Report Card for America’s Infrastructure reported that 42% of U.S. bridges were at least 50 years old, while 7.5% were classified as structurally deficient. Those figures do not prove that polymer modified concrete is the right answer for every repair. They show why project teams should assess exposure, bond requirements, thickness, curing conditions, and expected service life before specifying it. Antonio Nanni, a recognized concrete repair and strengthening specialist, has emphasized through his published work that repair decisions must account for the existing structure and its conditions—not just the repair material’s advertised strength.
Details matter. Is the surface damp? Will traffic return quickly? Could freeze-thaw cycles or de-icing salts reach the repair? Polymer type and dosage can affect workability, adhesion, permeability, and curing behavior. So can workmanship. A sound specification should define performance tests and installation controls, then verify them with the supplier and project engineer. There is no universal mix. And one uncomfortable truth: a premium material cannot compensate for poor surface preparation. This guide offers a practical framework for comparing options, checking evidence, and choosing a system suited to the project—not merely the product sheet.
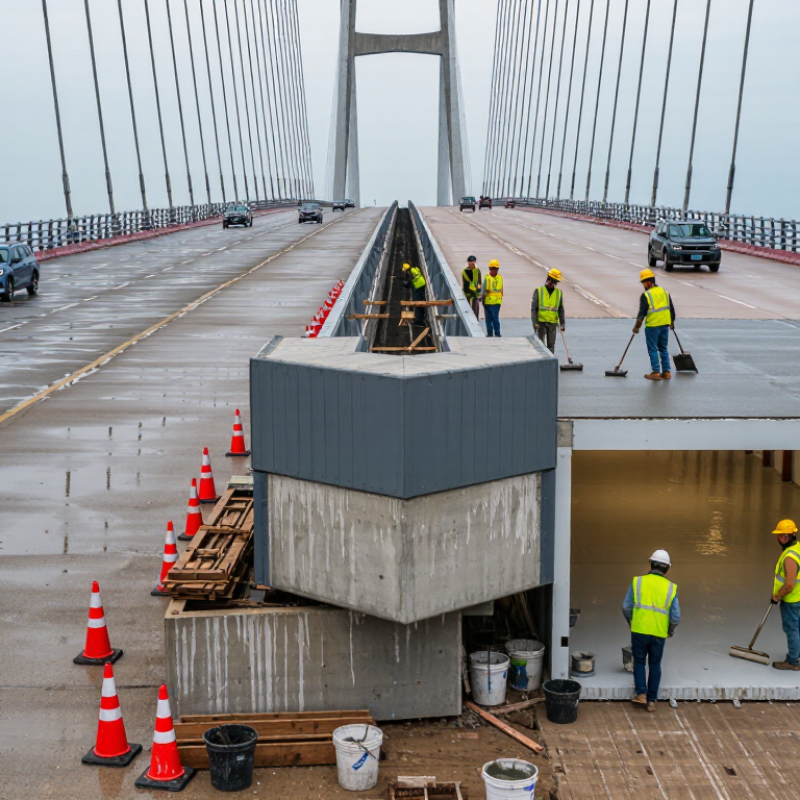
Polymer modified concrete is a cement-based mix with added polymers, often supplied as a liquid latex or a dry powder. Unlike polymer concrete, it still relies on cement and water to bind its aggregates. The polymer changes how the hardened material behaves. As the mix cures, polymer particles form a flexible network among cement products and aggregate grains. This can improve adhesion, reduce water penetration, and help the material resist cracking under movement.
It is still concrete.
That combination can suit thin repairs, overlays, and surfaces exposed to moisture or repeated wear. Imagine patching a stair tread: a well-bonded repair is less likely to separate at the edges when people step on it. Results depend on the formulation, mixing, substrate, and curing conditions; polymer addition alone cannot fix poor preparation. Dust, loose concrete, and standing water may weaken the bond.
Small details matter. Follow the product’s specified water ratio and curing instructions, and check that the existing surface is sound.
The distinction between “stronger” and “right for this job” is easy to blur. A flexible repair may be useful, but it is not automatically suitable for every structural or heavily loaded application.
How to Choose Polymer Modified Concrete for Your Project?
Which Project Requirements Should Guide Your Selection
Start with the conditions the repair must survive, not a product’s headline strength. Will the surface face deicing salts, standing water, freeze-thaw cycles, or heavy turning traffic? ASCE’s 2021 Infrastructure Report Card counted 42,951 U.S. bridges in poor condition in 2020. That figure shows the scale of repair needs, but each site still demands its own assessment.
Check the existing concrete before specifying a polymer-modified mix. Weak, dusty, or saturated substrate can undermine bond, even when the overlay performs well in laboratory tests. Ask for bond results using ASTM C1583, and review freeze-thaw testing under ASTM C666 when climate exposure makes it relevant. Small details matter. For a thin patch, placement and curing conditions may matter more than peak compressive strength. For a bridge deck, chloride exposure, traffic reopening time, and required overlay thickness deserve equal attention. I would not treat a fast-opening claim as a guarantee; temperature and crew practice can shift field results. That part is easy to underestimate.
Compare the proposed material’s working time, moisture tolerance, shrinkage behavior, and compatibility with the prepared substrate. ASTM C1202 results can help compare electrical charge passed, but they are not a direct measurement of permeability. Request project-specific data and a trial area where practical. A neat laboratory number can still hide an awkward placement window.
Choosing polymer modified concrete starts with comparing the polymer, cement mix, and job conditions together. Acrylic and SBR latex modifiers can improve adhesion and reduce water penetration in repair mortars, but performance varies by formulation. Check whether the product is intended for thin overlays, patching, or full-depth repairs. Different jobs need different mixes. A stair nosing exposed to rain needs reliable bond and abrasion resistance; a sheltered interior patch may prioritize workability instead.
Read technical data sheets for polymer content, recommended water ratio, curing conditions, and suitable thickness. Compare results from relevant tests, such as bond strength, shrinkage, and freeze-thaw resistance when those conditions apply. Do not compare numbers blindly: test methods and specimen preparation can differ. Some epoxy-based systems are polymer concrete rather than ordinary cement mixes modified with latex, so treat them as a separate formulation. A small site trial can reveal handling issues that a laboratory figure misses. I have seen that detail overlooked.
Tips: Mix only the amount usable within the stated working time. Keep substrate moisture and temperature consistent during trials. Record batch proportions and curing conditions; otherwise, results are hard to repeat. If the data sheet leaves a key exposure or application question unanswered, ask the supplier’s technical team before specifying the material.
Polymer-modified concrete should suit the placement method, not just the repair depth. For a thin vertical patch, choose a mix with enough body to resist slumping and enough working time for careful finishing. For a broad floor repair, flow and ease of leveling may matter more. Check the technical data for recommended thickness, substrate preparation, water limits, and curing requirements. A damp surface may help some mixes bond, while standing water can weaken placement.
Tips: Make a small trial batch. Check how it spreads, sticks, and finishes before mixing the full amount. Keep tools and measured water ready.
Site conditions can change the result. Warm, windy weather may dry exposed edges quickly; cold conditions can slow setting. Protect the repair from rapid moisture loss and follow the specified temperature range. In practice, a mix that looks workable in a bucket can feel sticky under a trowel, especially on a rough wall. That mismatch is easy to miss. A small mock-up on the prepared substrate can reveal handling issues before they affect the whole repair. For unusual loads or exposure, confirm the mix selection with a qualified materials professional.
Use this qualitative guide to compare common mix types. Scores indicate typical fit, not measured performance: formulations vary, so confirm placement limits, substrate moisture requirements, temperature range, and cure time in the product data sheet.
How to Choose Polymer Modified Concrete for Your Project?
How to Verify Performance, Compatibility, and Lifecycle Cost
Choose polymer-modified concrete using test evidence tied to the exposure, not a product label. Ask for a technical data report showing bond and flexural strength, water absorption, curing conditions, specimen age, and test methods. ASTM C1439 provides test methods for polymer-modified mortar and concrete; use comparable methods when reviewing competing mixes. A 28-day strength value alone tells little about adhesion to a damp, rough repair surface. Details matter.
Check compatibility on the actual substrate. Record its moisture, temperature, surface profile, and preparation, then confirm the proposed mix can be placed within the available work window. A small trial patch can reveal poor wetting or edge debonding before a full repair. Not foolproof. I would still question results that lack test variability or describe ideal laboratory conditions only.
For lifecycle cost, compare installed cost, access equipment, traffic disruption, inspection, and likely repair intervals. The FHWA’s Life-Cycle Cost Analysis Primer explains why alternatives should be compared over a shared analysis period, rather than by initial price alone. Build a simple cost-per-service-year estimate, then test how it changes if the repair needs attention earlier than expected. That assumption is easy to overlook. Keep the source reports, site notes, and chosen assumptions together; future maintenance teams may need to revisit them.
| Selection dimension | What to verify | Useful test or reference | Project-level decision guidance |
|---|---|---|---|
| Repair purpose and exposure | Identify whether the work is a patch, overlay, topping, or protective layer, and document exposure to traffic, water, chlorides, chemicals, and freeze–thaw cycles. | Project drawings, condition survey, exposure assessment, and the applicable repair specification. | Choose the performance requirements from the actual exposure and function. A material suitable for a sheltered repair may not be suitable for a traffic-bearing or chloride-exposed surface. |
| Strength class | Check compressive strength and, where relevant, flexural strength against structural demands and the strength of the existing concrete. | EN 1504-3 class requirements include minimum compressive strengths of 25 MPa for R3 and 45 MPa for R4. Confirm the applicable edition and product test data. | Treat these as product-class thresholds, not a guarantee of field performance. Avoid selecting strength alone; an overly stiff repair can create stress concentrations in a weaker substrate. |
| Bond to existing concrete | Verify bond strength and the failure location, as well as substrate preparation, moisture condition, and any required primer or bonding slurry. | ASTM C1583/C1583M pull-off testing. EN 1504-3 specifies minimum bond strengths of 1.5 MPa for R3 and 2.0 MPa for R4. | Check compatibility using representative substrate and site preparation. A test result should be interpreted with its failure mode; failure in weak substrate may limit the achievable bond. |
| Deformation compatibility | Compare elastic modulus, drying shrinkage, thermal movement, and the repair geometry with the existing concrete and restraint conditions. | ASTM C469/C469M for static modulus and ASTM C157/C157M for length change of hardened hydraulic-cement mortar and concrete. | Review test values alongside substrate properties, layer thickness, joints, and curing conditions. Laboratory results do not by themselves predict cracking in a restrained field repair. |
| Water and chloride exposure | Assess water absorption, permeability-related indicators, and resistance to chloride ingress for the intended exposure. | ASTM C642 measures density, absorption, and voids; ASTM C1202 measures electrical charge passed as an indicator related to chloride-ion penetrability. | Compare results from the same test method and similar curing conditions. ASTM C1202 is an electrical indication, not a direct measurement of long-term chloride diffusion. |
| Freeze–thaw and surface wear | For saturated or cold-weather exposure, review freeze–thaw durability; for floors and pavements, verify abrasion resistance and surface finish suitability. | ASTM C666/C666M evaluates resistance to rapid freezing and thawing. ASTM C944/C944M is one method for abrasion resistance of concrete or mortar surfaces. | Set acceptance criteria for the project and confirm that the tested mix, air system, finishing, and curing are representative of the proposed installation. |
| Installation and curing | Confirm workable time, placement thickness, substrate moisture requirements, mixing procedure, finishing window, and temperature limits. | Product-specific technical data and a trial installation under expected site conditions; record ambient and substrate temperatures and curing method. | Include labor access, traffic reopening time, surface preparation, and curing protection in the specification. Polymer-modified formulations differ, so follow the tested system instructions. |
| System compatibility | Check compatibility with reinforcement, primers, sealers, membranes, adjacent concrete, and any coatings or joint materials. | Review system documentation and conduct a representative mock-up or adhesion trial when interfaces are critical. | Confirm sequencing and intercoat requirements in writing. Do not assume that separately compliant materials will automatically perform as a combined system. |
| Lifecycle cost | Compare installed cost, preparation and curing, traffic or service interruption, inspection, expected maintenance, and likely repair frequency over the assessment period. | Use project quantities, contractor quotations, maintenance records, and a consistent lifecycle-cost calculation. | A practical comparison is: initial installed cost + discounted future maintenance and repair costs + user or downtime costs. State the analysis period, discount rate, and assumptions; do not compare material prices alone. |